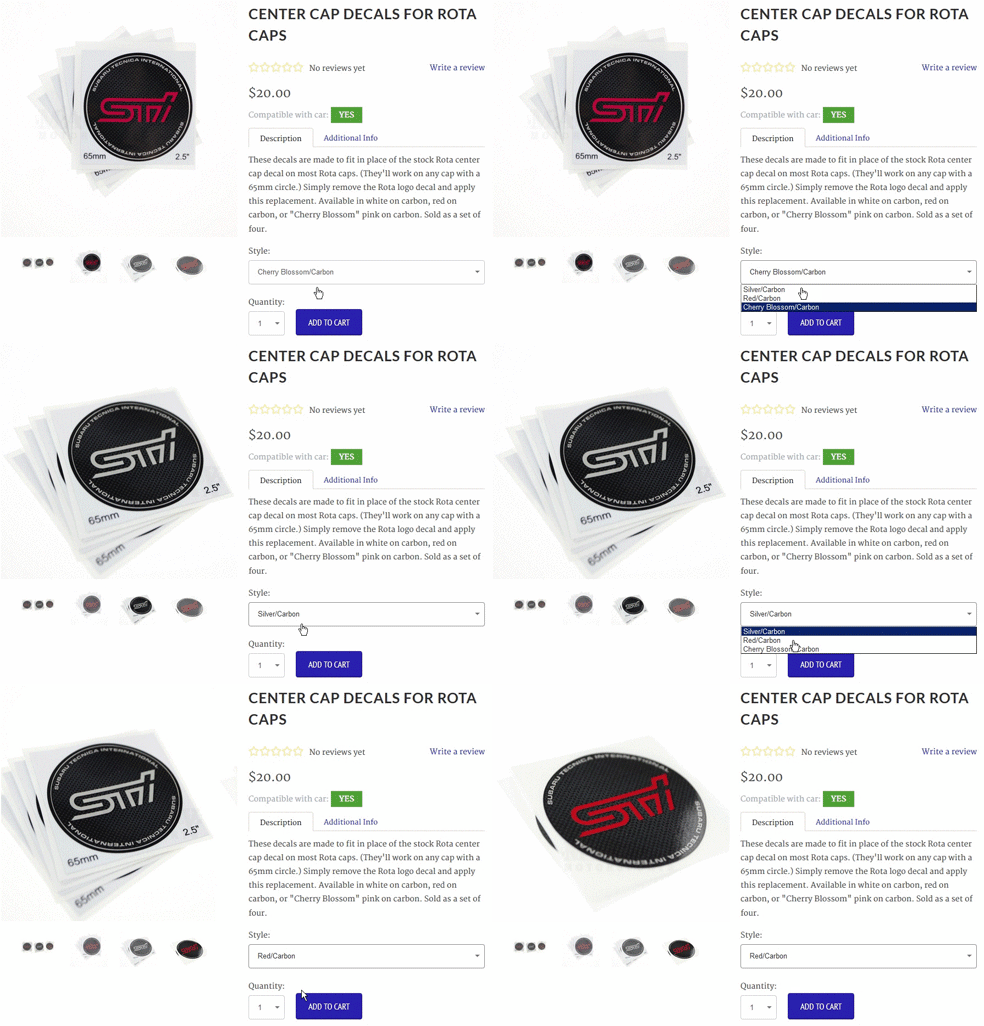
Product slideshows are indispensable when it comes to e-commerce websites. One little feature that we usually see on product slideshows is the ability to switch images based on the selection of product options such as colors. It’s a little feature that makes a difference!

A staple feature of e-commerce websites.
In Shopify, this feature may already comes standard with most of the themes or in an updated version of the current theme you are using, which is great. However in some cases you could be using a heavily customized theme and updating is not going to be a breeze, well, all you need is just a couple of lines of codes and you got yourself an upgraded product slideshow.
The Code
Paste the code below into the bottom of either template file product.liquid or snippet file product-form.liquid.
{% if product.variants.size > 1 %}
<script>
(function($) {
  var variantImages = {},
    thumbnails,
    variant,
    variantImage,
    variantImage_count = 0;
  	//produce mapping between variant image and options
    {% for variant in product.variants %}
       variant = {{ variant | json }};
       if ( typeof variant.featured_image !== 'undefined' && variant.featured_image !== null ) {
         variantImage =  variant.featured_image.src.split('?')[0].replace(/http(s)?:/,'');
         variantImages[variantImage] = variantImages[variantImage] || {};
         {% for option in product.options %}
           {% assign option_value = variant.options[forloop.index0] %}
           {% assign option_key = 'option-' | append: forloop.index0 %}
           if (typeof variantImages[variantImage][{{ option_key | json }}] === 'undefined') {
             variantImages[variantImage][{{ option_key | json }}] = {{ option_value | json }};
           }
           else {
             var oldValue = variantImages[variantImage][{{ option_key | json }}];
             if ( oldValue !== null && oldValue !== {{ option_value | json }} )  {
               variantImages[variantImage][{{ option_key | json }}] = null;
             }
           }
         {% endfor %}
         variantImage_count++;
   	   }
    {% endfor %}

    $(function() {

      if (variantImage_count > 0) {
        $('select.single-option-selector').change(function() {
          var selected_color = $(this).val();
          thumbnails = $('.flex-control-thumbs img').each(function(index, el) {
            var image = $(el).attr('src').split('?')[0].replace(/(_thumb\.)|(_small\.)|(_compact\.)|(_medium\.)|(_large\.)|(_grande\.)/,'.');
            if (typeof variantImages[image] !== 'undefined') {
              if(selected_color == variantImages[image]['option-0']) {
                //only check against the first option ['option-0'], which is Color (in my case)
              	$('.flexslider').flexslider(index);
              }
            }
		      });
        });
      }

    });
})(jQuery);
</script>
{% endif %}
The code is a combination of Liquid template tags and JS. It is based on the customization provided by Shopify for enabling customers to select a product variant by clicking its image and modified to work the other way around.
Line 10-30 produces the mapping between variants image and options in a JSON object that is used for comparison against the product thumbnails in the select box event handler function as seen in line 35-46. Line 42 is the actual code that tells the slideshow to jump to a specific slide. As you might have guessed, the code is unique to Flexslider slideshow plugin. You need to determine what slideshow plugin you are using and then figure out how to jump to a specific slide using its API.
I hope you find this guide useful. If you have questions/feedback, let me know in the comments.
Have a nice day!
